tyson hot wings cooking instructions

Tyson Hot Wings offer a delicious, crispy texture with bold flavors, perfect for satisfying cravings. Easy to cook, they deliver a mouthwatering experience for any occasion.

Overview of Tyson Hot Wings

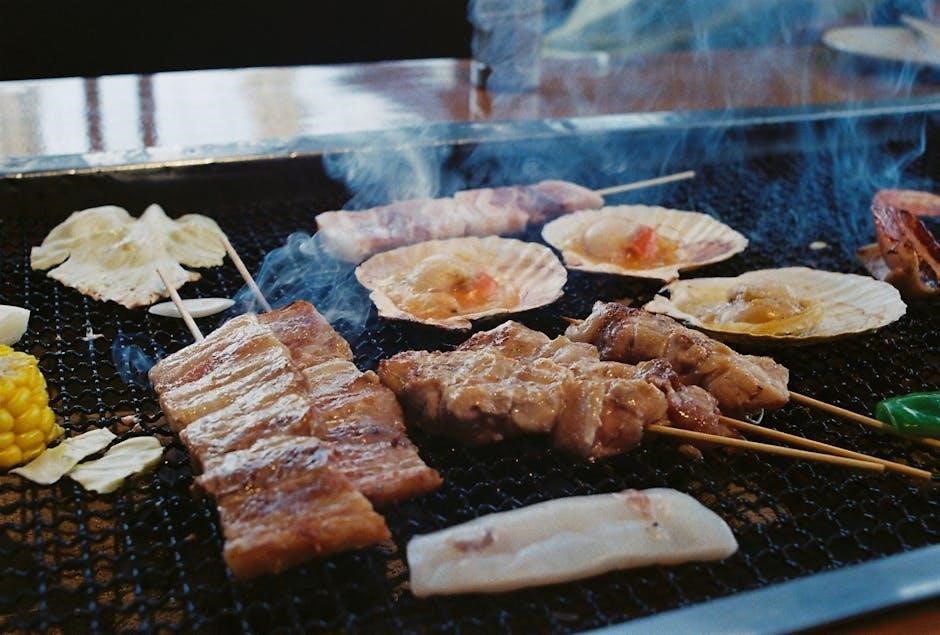
Tyson Hot Wings are a popular choice for those seeking flavorful, convenient, and crowd-pleasing snacks or meals. Known for their crispy exterior and juicy interior, these pre-seasoned and breaded chicken wings are designed to deliver a satisfying bite every time. Whether you’re hosting a party, enjoying a quick snack, or adding protein to your meal, Tyson Hot Wings offer versatility and ease. They come in various flavors to cater to different tastes, making them a go-to option for many. With multiple cooking methods available, such as baking, air frying, or deep frying, achieving that perfect crunch is effortless. Tyson Hot Wings are a hassle-free solution for any occasion, ensuring delicious results without the need for complex preparation.

Why Choose Tyson Hot Wings?

Tyson Hot Wings are a top choice for many due to their unmatched quality and convenience. Made from tender and juicy chicken, these wings are perfectly seasoned with a blend of spices that enhance their natural flavor. The pre-breaded coating ensures a crispy texture that’s hard to resist. With Tyson, you can achieve restaurant-quality wings in the comfort of your home without the hassle of extensive preparation. They are versatile, allowing you to cook them in various ways—baked, fried, or air-fried—to suit your preference. Tyson’s commitment to using high-quality ingredients makes their Hot Wings a reliable and delicious option for any meal or gathering. Whether you’re a busy parent or an avid entertainer, Tyson Hot Wings are a crowd-pleaser that’s easy to prepare and always satisfying.

Cooking Instructions for Tyson Hot Wings

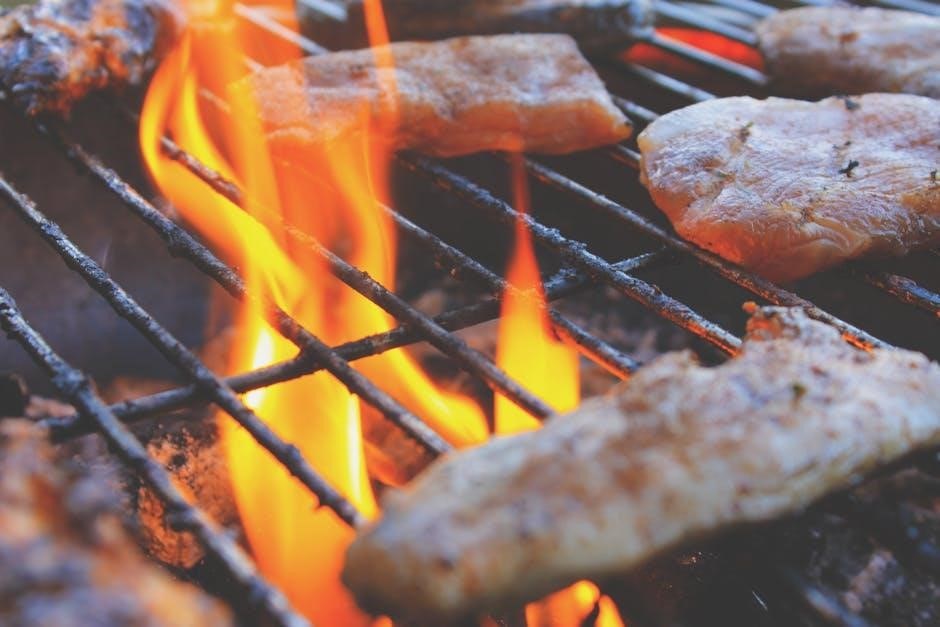
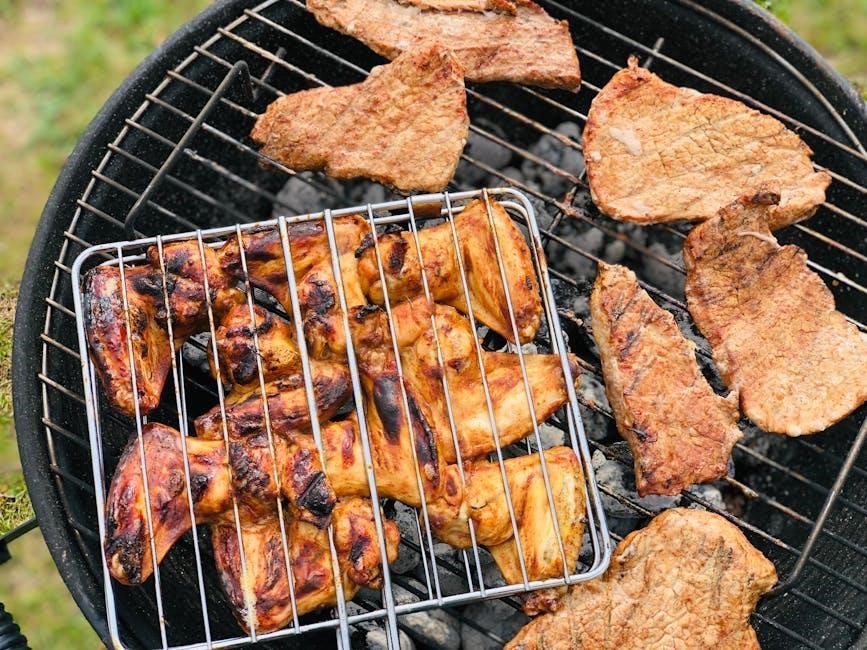
Tyson Hot Wings can be effortlessly cooked to crispy perfection using an oven, air fryer, or deep fryer, ensuring a deliciously golden result every time.

Ingredients and Tools Needed

To cook Tyson Hot Wings, you’ll need:

  • 1-2 bags of Tyson Hot Wings (depending on serving size)
  • Cooking oil (for deep frying)
  • Sauce (optional, for tossing after cooking)

Tools required include:

  • Oven: Baking sheet lined with aluminum foil or parchment paper, wire rack
  • Air Fryer: Air fryer basket
  • Deep Fryer: Large pot with at least 3-4 inches of oil, thermometer
  • Tongs or slotted spoon for handling wings
  • Paper towels for draining excess oil

Preheat your chosen cooking method according to package instructions for best results.

Oven Cooking Method

Preheat your oven to 400°F (200°C). Line a baking sheet with aluminum foil or parchment paper and place a wire rack on top for air circulation. Arrange Tyson Hot Wings evenly on the rack, leaving space between each wing for even cooking. Bake for 25-35 minutes, or until crispy and golden brown, flipping halfway through for uniform crispiness. For extra crispiness, increase the oven temperature to broil (400°F) for the last 5 minutes. Remove wings from the oven and let them cool slightly. For saucy wings, toss them in your favorite sauce while still warm. Serve immediately and enjoy! This method ensures a delicious, less messy alternative to deep frying while maintaining that perfect crunch.

Air Fryer Cooking Method

For a crispy and quick cooking experience, the air fryer is an excellent choice; Preheat the air fryer to 400°F (200°C) for 3-5 minutes. Place Tyson Hot Wings in a single layer in the air fryer basket, ensuring they are not overcrowded. Cook for 15-20 minutes, shaking the basket halfway through to ensure even cooking. If desired, increase the temperature to 420°F (220°C) for the last 3-5 minutes for extra crispiness. Once cooked, remove the wings and toss them in your favorite sauce while still warm. Pat dry the wings with a paper towel before cooking for optimal crispiness. This method offers a healthier alternative to deep frying with minimal cleanup and consistently delicious results every time.

Deep Fryer Cooking Method

The deep fryer method delivers the crispiest results for Tyson Hot Wings. Heat the deep fryer to 375°F (190°C), ensuring the oil reaches the correct temperature. Pat the wings dry with paper towels to remove excess moisture, promoting even frying. Carefully place the wings in batches to avoid overcrowding the fryer. Cook for 10-12 minutes or until golden brown and fully cooked. Stir occasionally to ensure uniform crispiness. Once done, remove the wings with a slotted spoon and drain on paper towels. For extra flavor, toss the wings in your preferred sauce while still hot. Always use caution when working with hot oil and consider using a thermometer for precise temperature control. This method is ideal for achieving that classic fried texture and flavor.

Tips for Serving Tyson Hot Wings

Serve Tyson Hot Wings hot with your favorite dipping sauces and sides for an enhanced flavor experience. Pair them with fresh veggies or crusty bread for a satisfying meal.

Suggested Dipping Sauces

Enhance your Tyson Hot Wings with a variety of dipping sauces to complement their bold flavors. Try classic options like Ranch or Blue Cheese for a creamy contrast to the spicy wings. BBQ sauce adds a sweet and tangy twist, while Honey Mustard offers a balanced blend of flavors. For a zesty kick, Sweet and Sour sauce is a great choice. If you prefer something savory, Garlic Parmesan is an excellent option. For those who enjoy extra heat, Frank’s RedHot sauce pairs perfectly with the wings’ spicy profile. Experiment with these sauces to find your favorite combination and elevate your hot wing experience to the next level. The right dip can make every bite even more satisfying and flavorful.

Alright, so I need to generate the text for the subheading ‘

Side Dishes to Pair With Hot Wings

‘ under the topic ‘tyson hot wings cooking instructions’. The user has given me some specific instructions to follow, so I need to make sure I adhere to all of them carefully.

First, I must remember not to include any information that will be in other subheadings. That means I should focus solely on side dishes and not touch on dipping sauces or cooking methods, which are covered elsewhere. The word count is strictly , so I need to be concise and make every word count.

The user emphasized using information from the internet, but in the provided history, most of the data was about Mike Tyson and Tyson Foods, not specifically about side dishes for hot wings. This might be a bit challenging, but I can infer common side dishes that typically accompany hot wings based on general knowledge.

I should brainstorm a list of popular side dishes that go well with hot wings. Common ones include celery sticks with ranch or blue cheese dressing, French fries, onion rings, coleslaw, baked beans, and garlic bread. These are all classic pairings that complement the spicy and savory flavors of hot wings.

Now, I need to structure this information into a coherent paragraph. I should start by introducing the idea of pairing side dishes with hot wings, then list the options, and conclude with a sentence that ties everything together, emphasizing how these sides enhance the overall experience.

I also need to ensure that the language is clear and engaging, and that each sentence flows naturally to the next. Since I’m limited to , I need to be precise and avoid any unnecessary fluff.

Let me draft a sample paragraph based on these thoughts:

“When enjoying Tyson Hot Wings, it’s essential to pair them with the right side dishes to balance the flavors. Classic options like celery sticks accompanied by ranch or blue cheese dressing provide a refreshing contrast to the spicy wings. Crispy French fries or onion rings add a satisfying crunch, while creamy coleslaw offers a cooling effect. Baked beans bring a sweet and smoky complement, and garlic bread serves as a hearty accompaniment to soak up the sauce. These sides not only enhance the flavor profile but also create a well-rounded meal that’s perfect for any gathering.”

Now, I need to check the word count. Let me count the words in this draft:
When
enjoying
Tyson
Hot
Wings,
it’s
essential
to
pair
them
with
the
right
side
dishes
to
balance
the
flavors;
Classic
options
like
celery
sticks
accompanied
by
ranch
or
blue
cheese
dressing
provide
a
refreshing
contrast
to
the
spicy
wings.
Crispy
French
fries
or
onion
rings
add
a
satisfying
crunch,
while
creamy
coleslaw
offers
a
cooling
effect.

Baked
beans
bring
a
sweet
and
smoky
complement,
and
garlic
bread
serves
as
a
hearty
accompaniment
to
soak
up
the
sauce.
These
sides
not
only
enhance
the
flavor
profile
but
also
create
a
well-rounded
meal
that’s
perfect
for
any
gathering.

That’s , which is under the 133-word limit. I need to expand a bit more to reach exactly without exceeding it. I can add more details about each side dish or perhaps include another option.

Let me revise and add another side dish, maybe potato salad or a fresh green salad:

“When enjoying Tyson Hot Wings, it’s essential to pair them with the right side dishes to balance the flavors. Classic options like celery sticks accompanied by ranch or blue cheese dressing provide a refreshing contrast to the spicy wings. Crispy French fries or onion rings add a satisfying crunch, while creamy coleslaw offers a cooling effect. Baked beans bring a sweet and smoky complement, and garlic bread serves as a hearty accompaniment to soak up the sauce. Additionally, a side of potato salad or a fresh green salad can provide a lighter, refreshing contrast. These sides not only enhance the flavor profile but also create a well-rounded meal that’s perfect for any gathering, ensuring a delightful and satisfying experience for everyone.”

Now, let’s count the words again:

When
enjoying
Tyson
Hot
Wings,
it’s
essential
to
pair
them
with
the
right
side
dishes
to
balance
the
flavors.
Classic
options

like
celery
sticks
accompanied
by
ranch
or

blue
cheese
dressing
provide
a
refreshing
contrast
to
the
spicy
wings.
Crispy
French
fries
or
onion
rings
add
a
satisfying
crunch,
while
creamy
coleslaw
offers
a
cooling
effect.
Baked
beans
bring
a
sweet
and
smoky
complement,
and
garlic
bread
serves
as
a
hearty
accompaniment
to
soak
up
the
sauce.
Additionally,
a
side
of
potato
salad
or
a
fresh
green
salad
can
provide
a
lighter,
refreshing
contrast.
These
sides
not
only
enhance
100. the
101. flavor
102. profile
103. but
104. also
105. create
106. a
107. well-rounded
108. meal
109. that’s
110. perfect
111. for
112. any
113. gathering,
114. ensuring
115. a
116. delightful
117. and
118. satisfying
119. experience
120. for
121. everyone.

Now, that’s . Still under the limit. I can add a bit more, perhaps mention how these sides complement different occasions or preferences.

Revised version:

“When enjoying Tyson Hot Wings, it’s essential to pair them with the right side dishes to balance the flavors. Classic options like celery sticks accompanied by ranch or blue cheese dressing provide a refreshing contrast to the spicy wings. Crispy French fries or onion rings add a satisfying crunch, while creamy coleslaw offers a cooling effect. Baked beans bring a sweet and smoky complement, and garlic bread serves as a hearty accompaniment to soak up the sauce. Additionally, a side of potato salad or a fresh green salad can provide a lighter, refreshing contrast. These sides not only enhance the flavor profile but also create a well-rounded meal that’s perfect for any gathering, whether it’s a casual dinner or a festive party, ensuring a delightful and satisfying experience for everyone.”

Word count now:

When

enjoying
Tyson
Hot
Wings,
it’s
essential
to
pair
them
with
the
right
side
dishes
to
balance
the
flavors.
Classic
options
like
celery
sticks
accompanied
by
ranch

or
blue
cheese
dressing
provide
a
refreshing
contrast
to
the
spicy
wings.
Crispy
French

fries
or
onion
rings
add
a
48

Cooking Tyson Hot Wings is simple and rewarding, offering delicious results. Whether baked, fried, or air-fried, they promise a flavorful experience every time at home.

Final Thoughts on Cooking Tyson Hot Wings

Cooking Tyson Hot Wings is a straightforward process that delivers flavorful and crispy results. Whether you choose to bake, air fry, or deep fry, the outcome is consistently delicious. The versatility of these wings allows for customization, making them ideal for various occasions, from casual gatherings to game-day snacks. Pairing them with your favorite dipping sauces and sides enhances the overall experience. For the best results, ensure even cooking and monitor temperatures to achieve the perfect crispiness. Experimenting with different seasonings or sauces can also elevate the flavor profile. Ultimately, Tyson Hot Wings offer a convenient and satisfying option for anyone looking to enjoy mouthwatering chicken without the hassle of complex preparation.

no sew fleece blanket instructions pdf

No-sew fleece blankets are a popular DIY project, offering a simple, cost-effective way to create warm and cozy throws․ Perfect for beginners, they require minimal tools and no sewing skills, making them a great option for charity initiatives or personalized gifts․ The process involves cutting and tying fleece strips, resulting in a durable and soft blanket․ This method is ideal for those looking for a quick, easy, and rewarding crafting experience․

What Are No-Sew Fleece Blankets?

No-sew fleece blankets are a type of DIY project that involves creating a warm and cozy blanket without the need for sewing․ These blankets are made by cutting fleece fabric into strips and then tying the strips together to form a decorative fringe along the edges․ The process is simple and requires minimal tools, making it accessible to everyone, including beginners․ The blankets are durable, soft, and can be customized in various colors and sizes․ They are often used as personalized gifts, charity donations, or quick solutions for keeping warm․ The no-sew method is particularly popular because it eliminates the need for advanced crafting skills or specialized equipment, making it a fun and rewarding project for all ages․

Why No-Sew Fleece Blankets Are Popular

No-sew fleece blankets have gained immense popularity due to their ease of creation and versatility․ They require no sewing skills, making them accessible to everyone, including beginners․ The process is quick, often completed in a few hours, and allows for customization in size, color, and patterns․ These blankets are also budget-friendly, as they use readily available fleece fabric․ Additionally, they serve as thoughtful, handmade gifts for loved ones or charitable donations, providing warmth and comfort to those in need․ Their simplicity and adaptability make them a favorite among crafters and DIY enthusiasts, ensuring their continued popularity as a practical and heartfelt project․

Materials and Tools Needed

Fleece fabric (1-2 yards), sharp scissors, a ruler or cutting mat, and a rotary cutter are essential․ Optional tools include a self-healing mat for precise cuts․

Fleece Fabric Requirements

Fleece fabric is the primary material for no-sew blankets․ It is recommended to use high-quality, anti-pill fleece to ensure durability and a soft texture․ The fabric typically comes in widths of 60 inches, allowing for versatile sizing․ For a standard blanket, 1-2 yards of fleece are sufficient, depending on the desired size․ Choose from a variety of colors and patterns to customize your blanket․ When selecting, ensure the fabric is evenly woven and free of defects․ It is also important to pre-wash the fleece to remove any finishes and prevent shrinkage․ For a double-layered blanket, two coordinating pieces of fleece are needed․ Always match the size and orientation of the fabric pieces for a professional finish․

Essential Tools for the Project

Sharp scissors or a rotary cutter are necessary for cutting fleece accurately․ A long ruler or cutting mat helps measure and align fabric evenly․ Fabric scissors are preferred over household scissors to ensure clean cuts․ A self-healing mat protects your work surface and prevents damage from cutting tools․ For tying knots, a pair of smaller scissors can be handy to trim excess fringe․ Optional tools include a seam ripper for correcting cuts and a measuring tape for precise sizing․ Having these tools organized ensures the project progresses smoothly and efficiently, resulting in a professional-looking blanket․

Step-by-Step Instructions

Begin by preparing the fleece, then cut fringe along the edges․ Tie knots securely, ensuring even spacing․ Trim excess fabric for a polished finish․ Simple and quick!

Preparing the Fleece Fabric

Start by washing and drying the fleece to ensure softness and prevent shrinkage․ Lay the fabric flat on a stable surface, smoothing out any wrinkles․ Remove the selvage edges using sharp scissors or a rotary cutter, as these can cause unevenness․ If using two layers, align them evenly, ensuring the patterns or colors match․ Trim the edges to make sure both pieces are the same size․ Iron the fleece on a low setting to remove any creases․ Finally, let the fabric cool before proceeding to cut the fringe․ Proper preparation ensures a neat and professional-looking blanket․ This step is crucial for a smooth and successful project․

Cutting the Fringe

Cutting the fringe is a critical step in creating a no-sew fleece blanket․ Begin by measuring and marking 4-inch strips along all four sides of the fleece․ Using sharp scissors or a rotary cutter, carefully cut 1-inch-wide strips around the entire blanket․ Ensure the cuts are consistent and evenly spaced․ For a standard fringe, make small cuts about 1 inch apart, stopping at the marked line to avoid cutting too deeply․ If desired, customize the fringe length for a longer or shorter look․ This step sets the stage for tying the knots, so precision is key․ Use a ruler to guide your cuts for straight, uniform strips․ Properly cut fringe ensures a neat and professional finish․

Tying the Knots

Tying the knots is the final step that brings your no-sew fleece blanket together․ To begin, take one strip from the front and one from the back, looping them together․ Tie an overhand knot close to the edge of the blanket to secure the fringe․ Repeat this process for each pair of strips, working your way around the blanket․ Ensure the knots are tight and evenly spaced for a polished look․ For consistency, tie each knot at the same distance from the edge․ If a knot comes undone, simply retie it․ This step requires patience, but the result is a durable, finished blanket with a decorative fringe edge․ Properly tied knots ensure the blanket remains intact and looks professional․

Finishing the Edges

Finishing the edges of your no-sew fleece blanket ensures a polished and professional appearance․ Once all knots are tied, inspect the blanket for any uneven or loose edges․ Trim any excess fleece or fringe to maintain uniformity․ For a cleaner look, tuck the ends of the fringe under the blanket and secure them with a small knot if needed․ If desired, fold the edges of the blanket and pin them in place before tying the knots for a more decorative finish․ Ensure all knots are tightly secured to prevent fraying․ This step completes the blanket, leaving it soft, durable, and ready for use․ Properly finishing the edges enhances the blanket’s overall quality and aesthetic appeal, making it a cozy and lasting creation․

Customizing Your Blanket

Customize your no-sew fleece blanket with decorative edges, embroidery, or appliques for a personalized touch․ Add unique patterns or names to make it extra special and meaningful․

Adding Decorative Edges

Add a polished look to your no-sew fleece blanket by incorporating decorative edges․ One popular method is the “tie-knot” edge, where fringe strips are tied together in overhand knots․ For a cleaner appearance, consider a “braided fringe” by intertwining three strips and securing them with a knot․ Alternatively, a “double-layer fringe” can add thickness and texture․ Another option is to add a contrasting fabric strip along the edges for a pop of color․ These techniques enhance the blanket’s visual appeal without requiring sewing․ Ensure the fringe is evenly spaced and the knots are tight for a professional finish․ This step is crucial for both aesthetics and durability, making your blanket truly special․

Personalizing with Embroidery or Appliques

Personalize your no-sew fleece blanket with embroidery or appliques for a unique touch․ Use fabric paint or iron-on transfers to add names, quotes, or designs․ For embroidery, stitch simple patterns or letters using a needle and thread․ Appliques can be pre-made or custom-cut from contrasting fabric, applied using fabric adhesive or heat-activated tape․ These embellishments add character and make the blanket extra special․ Consider using templates or stencils for precise designs․ Ensure the adhesive or paint is fully dry before handling․ This step allows you to tailor the blanket to the recipient’s preferences, creating a heartfelt and personalized gift․ It’s a great way to add a creative flourish without sewing․

Tips for Making the Perfect No-Sew Fleece Blanket

Use sharp scissors and a ruler for clean cuts․ Cut fringe evenly and trim selvage edges to prevent stretching․ Tie knots tightly for a polished finish․

General Tips for Success

For a successful no-sew fleece blanket, start by ensuring your fabric is flat and smooth․ Use sharp scissors or a rotary cutter for clean cuts, and trim the selvage edges to prevent fraying․ Measure carefully to maintain even fringe width, typically 3-4 inches, and cut uniformly for a professional look․ When tying knots, work methodically to avoid missing any fringe strips․ Use a consistent knot-tying pattern to ensure a neat and polished finish․ To add personal touches, consider alternating knot styles or incorporating decorative elements like beads․ Always double-check your work to ensure all ties are secure and evenly spaced․ This attention to detail will result in a cozy, well-crafted blanket that lasts․

Common Mistakes to Avoid

When making a no-sew fleece blanket, avoid cutting uneven fringe strips, as this can result in an uneven appearance․ Ensure all cuts are straight and precise, using sharp tools to prevent jagged edges․ Another common mistake is not trimming the selvage edges beforehand, which can lead to fraying․ Tying knots too loosely or too tightly can cause the blanket to unravel or pucker․ Additionally, avoid tying two fringe strips together, as this creates bulkiness․ Always work on a flat surface to maintain evenness and prevent misalignment․ To achieve a professional finish, double-check your work and retie any uneven knots․ By being mindful of these pitfalls, you can create a smooth, polished no-sew fleece blanket that looks store-bought․

Troubleshooting Fringe Issues

Common fringe issues include uneven cuts, excessive fraying, or knots that come undone․ To fix uneven fringe, carefully re-cut the strips to match in length and width․ For excessive fraying, trim the loose ends with sharp scissors․ If knots are coming undone, gently tighten them and secure with a double knot․ To prevent fringe from unraveling, ensure all cuts are clean and made with sharp tools․ For wrinkled fringe, lightly iron the fleece on a low setting․ Regularly inspect the blanket and address any issues promptly to maintain its appearance․ By addressing these common problems, you can ensure your no-sew fleece blanket remains sturdy and visually appealing for years to come․

No-sew fleece blankets are a rewarding DIY project, offering a simple way to create cozy, personalized throws․ Perfect for all skill levels, they make thoughtful gifts and contribute to charity initiatives, spreading warmth and comfort easily․

Final Thoughts on No-Sew Fleece Blankets

No-sew fleece blankets are a delightful and practical DIY project, perfect for crafters of all levels․ They offer a quick and easy way to create warm, cozy throws that are both functional and sentimental․ The simplicity of the process—cutting fringe and tying knots—makes it accessible to everyone, while the ability to customize with colors and patterns adds a personal touch․ Whether making one for personal use or as a gift, no-sew fleece blankets are a heartwarming way to share comfort and love․ Their durability and softness ensure they remain a cherished possession for years to come․

Encouragement to Try the Project

Creating a no-sew fleece blanket is a rewarding and enjoyable experience that anyone can undertake․ With minimal tools and no sewing required, it’s the perfect project for crafting newcomers․ The process is straightforward, involving simple steps like cutting fringe and tying knots, making it a great activity for families or groups․ Seeing the finished blanket come together is incredibly satisfying, knowing it will provide warmth and comfort to whoever receives it․ Whether making one for yourself or as a thoughtful gift, this project offers a sense of accomplishment and the joy of creating something meaningful․ So, gather your materials and give it a try—you’ll be amazed at how easy and fulfilling it is to create your own no-sew fleece blanket!

smart trike splash instructions

The Smart Trike Splash is an innovative, adaptive trike designed for early childhood development. It transitions from a stroller to an independent trike, promoting active play and growth. With its Touch Steering technology, storage bag, and bottle holder, it offers convenience and comfort for both parent and child.

1.1 Overview of the Smart Trike Splash

The Smart Trike Splash is a versatile, multi-stage tricycle designed to adapt to your child’s growth. It features Touch Steering technology for easy maneuverability and transitions from a parent-controlled stroller to an independent trike. With its trendy colors, removable storage bag, and bottle holder, it combines practicality with style. Engineered for comfort and safety, the Splash promotes active play and physical development, making it an ideal companion for early childhood adventures.

1.2 Importance of Following Instructions

Following the Smart Trike Splash instructions is crucial for ensuring safety and proper functionality. Correct assembly and usage practices prevent potential hazards and ensure the product performs as intended. Failure to follow guidelines may lead to malfunctions or injuries. Adhering to the manual also guarantees optimal performance and extends the product’s lifespan. Always read the instructions carefully before assembly and use to provide a safe and enjoyable experience for your child.

Safety Guidelines

Ensure the Smart Trike Splash is used on flat, stable surfaces. Always supervise children and use the parking brake when stationary. Avoid uncontrolled movements to prevent accidents.

2.1 Key Safety Precautions

Always ensure the Smart Trike Splash is used on flat, stable surfaces. Supervise children during use and engage the parking brake when stationary to prevent unintended movement. Avoid using the trike near stairs or steep slopes. Ensure the child wears protective gear, such as a helmet, and keep loose clothing tied back. Regularly inspect the trike for wear and tear, and follow weight and age limits to ensure safe operation.

2.2 Hazards to Be Aware Of

Be cautious of uncontrolled movement if the Smart Trike Splash is used without the parking brake engaged. Avoid steep slopes or uneven terrain, as this may cause instability. Ensure the child does not exceed the weight limit to prevent structural stress. Keep children away from hot or sharp components. Never leave the trike unattended near water or elevated areas to avoid accidents. Regular inspections can help identify potential hazards early, ensuring a safer experience for your child.

Assembly Instructions

Assemble the Smart Trike Splash by attaching wheels, handlebars, and aligning the frame. Tighten all bolts securely and ensure proper connections. Use the provided visual guide for precise steps. Inspect the trike before first use to ensure stability and safety.

3.1 Step-by-Step Assembly Process

Unbox and organize all components. Attach the wheels securely to the frame using the provided bolts. Install the handlebars and align the front wheel properly. Tighten all connections firmly. Use the QR code in the manual to access a live visual guide for precise assembly. Ensure the pedals are correctly fitted and the seat is adjusted to your child’s height. Double-check all safety features before allowing your child to use the trike.

3.2 Visual Guide for Assembly

Scan the QR code provided in the manual to access the live visual guide. This interactive tool offers a step-by-step assembly process with 360-degree views of each component. Follow the real-time instructions to ensure accurate fitting of parts like wheels, handlebars, and pedals. The guide highlights proper alignment and tightening techniques, making assembly straightforward and efficient; Use this resource to avoid errors and ensure your Smart Trike Splash is safely and correctly assembled for your child to enjoy.

Usage and Operation

The Smart Trike Splash is designed for children aged 1-5 years, supporting up to 33 lbs. It adapts from a parent-controlled stroller to an independent trike, promoting gradual independence and active play.

4.1 Age and Weight Limitations

The Smart Trike Splash is designed for children aged 1 to 5 years, with a maximum weight capacity of 33 lbs. It is engineered to adapt to your child’s growth, ensuring safe and comfortable use. The product transitions seamlessly from a parent-controlled stroller to an independent trike, making it suitable for various developmental stages. Always ensure your child meets the age and weight requirements to guarantee optimal safety and performance.

4.2 Parent and Child Interaction Features

The Smart Trike Splash is designed to foster interaction between parent and child. It features an adjustable parent handle for easy steering and control, allowing parents to guide the trike smoothly. The footrest and storage compartments provide comfort and convenience, while the removable storage bag and bottle holder keep essentials within reach. These features ensure a enjoyable experience for both parent and child, promoting bonding and active play. The trike’s intuitive design makes it easy for parents to engage with their child during use.

Maintenance Tips

Regularly inspect and clean the Smart Trike Splash to ensure optimal performance. Lubricate moving parts and check brakes for proper function. Store in a dry, protected area to maintain durability and safety.

5.1 Cleaning and Storage Recommendations

Regular cleaning ensures the Smart Trike Splash remains in optimal condition. Use mild detergent and water to wipe down surfaces, avoiding abrasive materials. Dry thoroughly to prevent rust. Store in a dry, protected area indoors to shield from weather damage. Hang or place upright to save space and maintain balance. Check for loose parts before storing. Proper maintenance extends the product’s lifespan and ensures safety for your child. Regular inspections and timely cleaning are essential for long-term durability.

5.2 Regular Inspections for Safety

Regular inspections are vital to ensure the Smart Trike Splash remains safe for use. Check the tires for proper inflation and wear, and inspect the brakes for functionality. Ensure the frame and joints are secure, with no signs of damage or rust. Verify that all bolts and screws are tightly fastened. Look for wear on moving parts, such as the pedals and wheels, and replace any worn components promptly. Regular checks help prevent accidents and ensure optimal performance. Always consult the manual for detailed inspection guidelines.

Troubleshooting Common Issues

This section addresses common issues like brake malfunctions or wheel misalignment. Follow the manual’s guidance to resolve problems efficiently, ensuring safety and optimal performance for your child.

6.1 Addressing Brake Malfunctions

Brake malfunctions can occur due to loose components or worn pads. Check the brake pads for wear and ensure they are properly aligned. Tighten the brake lever if it feels spongy. Lubricate moving parts lightly. If issues persist, refer to the visual guide or contact support. Always ensure brakes function correctly before use to maintain safety for your child. Regular inspections and maintenance are crucial to prevent such issues from arising.

6.2 Solving Wheel Alignment Problems

Wheel alignment issues may arise from incorrect assembly or uneven usage. To fix, loosen the wheel mounting bolts and adjust the wheels to ensure proper alignment. Tighten the bolts securely. If misalignment persists, refer to the step-by-step visual guide for precise adjustments. Regular checks and proper assembly are key to maintaining stability and safety. Always ensure wheels are aligned correctly before use to prevent wobbling and ensure smooth operation for your child’s safety and enjoyment.

Product Features

The Smart Trike Splash features an adaptive design with Touch Steering technology, high-quality storage bag, and bottle holder. It comes in trendy colors, ensuring comfort and style for both parent and child.

7.1 Design and Comfort Features

The Smart Trike Splash is designed with ergonomic comfort in mind, featuring an adjustable handlebar and padded seating for a snug fit. Its sturdy construction ensures durability while the lightweight frame makes it easy to maneuver. The trike includes a removable storage bag and bottle holder, adding practicality for parents. Available in trendy colors, it blends style with functionality. The adaptive design allows it to grow with your child, transitioning seamlessly from a stroller to an independent trike, ensuring long-lasting comfort and enjoyment.

7.2 Storage and Accessories

The Smart Trike Splash features a high-quality, removable storage bag and a convenient bottle holder, keeping essentials within easy reach. Its foldable design allows for compact storage, making it ideal for small spaces. Additional accessories, such as sun canopies or extra storage compartments, can be purchased separately to enhance functionality. The trike’s lightweight and adaptable design ensures it remains practical for both daily use and storage, catering to the needs of active families.

The Smart Trike Splash combines innovation and practicality, offering a fun, safe, and adaptive experience for children. This comprehensive guide ensures optimal use, promoting active play and learning for years to come.

8.1 Final Tips for Optimal Use

To maximize your experience with the Smart Trike Splash, ensure regular maintenance and inspections. Store it in a dry, clean space to preserve its condition. Always follow the age and weight guidelines to guarantee safety. Encourage your child to engage actively with the trike, fostering independence and physical development. By adhering to these tips, you’ll extend the product’s lifespan and ensure a enjoyable, safe experience for your child.

everlast heavy bag stand instructions

Welcome to the Everlast Heavy Bag Stand assembly guide! This manual provides step-by-step instructions to help you safely and efficiently assemble your heavy bag stand.

Overview of the Everlast Heavy Bag Stand

The Everlast Heavy Bag Stand is a durable, heavy-duty training equipment designed for home or gym use. Made from powder-coated steel tubing, it offers exceptional strength and stability. Featuring three weight plate pegs, it ensures maximum balance and prevents wobbling during intense workouts. Compatible with both heavy bags and speed bags, this stand is versatile for various training needs. Its sturdy construction and adjustable design make it a reliable choice for boxers and martial artists. Perfect for heavy use, it is built to withstand rigorous training sessions.

Importance of Following Assembly Instructions

Following the assembly instructions for the Everlast Heavy Bag Stand is crucial to ensure stability and safety. Proper assembly prevents wobbling and potential accidents during use. Misaligned parts or loose bolts can lead to equipment failure, risking injury or damage. By adhering to the guide, you maximize the stand’s durability and performance, ensuring a secure setup for your training sessions. This attention to detail guarantees a reliable and long-lasting product, essential for intense workouts. Always double-check each step to avoid errors that could compromise the stand’s integrity.

Prior to Assembly

Place the Everlast Heavy Bag Stand at your desired location. Remove all components from the box, ensuring all parts are present. Prepare an M8 wrench for assembly.

Checking Components and Parts

Carefully unpack and inspect all components of the Everlast Heavy Bag Stand. Ensure the package includes the stand frame, poles, bolts, screws, weight plate pegs, and an M8 wrench. Cross-reference the parts with the exploded drawing or parts list provided in the manual. Verify that all items are present and free from damage. Check for any missing or damaged components, as this could delay assembly. Familiarize yourself with the heavy-duty steel tubing and ensure all tools are ready for assembly.

Preparing the Assembly Area

Choose a spacious, flat, and stable area for assembly, ideally at least 4ft by 6ft. Clear the space of any obstacles or fragile items. Lay down a protective cover, like a tarp or old sheets, to prevent damage to the floor or components. Ensure good lighting and ventilation. Gather all tools and parts within easy reach. Having a second person assist can simplify the process. Position the stand frame and other parts in the center of the assembly area for easy access. This setup ensures a smooth and efficient assembly experience.

Assembly Process

Begin by carefully following the step-by-step instructions to assemble the stand. Start with the base, then attach the uprights and other components using the provided tools.

Step-by-Step Assembly Instructions

Begin by removing all components from the box and verifying all parts are present.

Start with the base assembly, attaching the uprights using the provided bolts and tools.

Next, secure the top crossbar and ensure all connections are tightened properly.

Attach the weight plate pegs to the base for added stability.

Finally, hang the heavy bag and test the stand for stability before use.

These steps ensure a safe and efficient assembly process.

Attaching the Heavy Bag to the Stand

To attach the heavy bag, locate the hanging loop at the top of the bag.

Wrap the chain or strap around the loop, ensuring it is securely fastened.

Hook the other end of the chain to the stand’s swivel hook.

Adjust the chain length to achieve the desired height and ensure balance.

Double-check all connections for safety before use. This ensures proper installation and stability of the heavy bag.

Tightening All Bolts and Screws

Once the stand is fully assembled, ensure all bolts and screws are securely tightened.

Use the provided wrench to tighten all connections firmly, starting from the base and working upward.

Double-check the stability of the stand by gently rocking it back and forth.

If any bolts feel loose, tighten them immediately to prevent instability during use.

Regularly inspect and tighten all hardware after heavy use to maintain safety and durability. This step is crucial for ensuring the stand remains stable and secure.

Stabilizing the Stand

Ensure your Everlast Heavy Bag Stand remains stable by adding weight plates and securing it to the floor. This prevents wobbling during intense workouts.

Adding Weight Plates for Stability

To enhance stability, attach weight plates to the designated pegs on the Everlast Heavy Bag Stand. Ensure the weights are evenly distributed for optimal balance. Place the heaviest plates at the lowest points to lower the center of gravity. Tighten all screws securely after adding weights. This step is crucial for preventing the stand from tipping during vigorous training sessions. Always double-check the weight distribution before use to ensure safety and performance. Properly secured weights will provide a solid foundation for your workouts.

Securing the Stand on the Floor

For maximum stability, secure the Everlast Heavy Bag Stand to the floor using screws or bolts. This prevents movement during intense workouts. Ensure the surface is level and sturdy. Place anti-slip pads or a rubber mat beneath the stand to enhance grip and reduce vibration. Tighten all floor anchors firmly to prevent shifting. For added safety, consult the manual for specific anchoring recommendations. Properly securing the stand ensures a stable and safe training experience, minimizing the risk of accidents or damage. Regularly inspect the anchors to maintain optimal stability.

Tips for Maintenance and Safety

Regularly inspect the stand for wear and tear, tighten loose bolts, and clean surfaces. Always ensure the stand is stable and properly weighted before use.

Regularly Inspecting the Stand

Regular inspections ensure the stand remains stable and secure. Check all bolts and screws for tightness, and look for any signs of wear or damage. Inspect the frame for rust or corrosion, especially in humid environments. Verify that weight plates are properly secured and that the stand is level. If any issues are found, address them immediately to prevent accidents. Regular maintenance helps extend the stand’s lifespan and ensures safe usage. Always refer to the manual for specific inspection guidelines tailored to your Everlast model.

Ensuring Safe Usage Practices

To ensure safe usage, always follow the manufacturer’s guidelines. Position the stand on a level, non-slip surface and secure it with weight plates or floor anchors. Avoid exceeding the weight capacity specified in the manual. Users should wear appropriate gear, such as hand wraps and gloves, to prevent injury. Ensure the area around the stand is clear of obstacles to allow safe movement. Supervise children and inexperienced users during training sessions; Regularly inspect the stand for stability and make adjustments as needed to maintain a secure setup.

Troubleshooting Common Issues

This section helps identify and resolve common issues with your Everlast Heavy Bag Stand, such as wobbling or loose parts, ensuring optimal performance and safety.

Addressing Wobbling or Instability

If your Everlast Heavy Bag Stand wobbles, check all bolts and screws for tightness. Ensure weight plates are securely attached. If instability persists, adjust the stand on a level surface or add more weights. Make sure the base is balanced and all connections are secure. Regularly inspect the stand’s frame and tighten any loose parts immediately. A stable stand ensures safe and effective training. Always refer to the manual for additional support.

Fixing Loose Connections

To fix loose connections on your Everlast Heavy Bag Stand, start by tightening all bolts and screws using an M8 wrench. Ensure all joints are secure and properly aligned. If a part feels unstable, double-check its connection points. Reassemble any components that were loosely fitted during assembly. After tightening, test the stand by gently rocking it to confirm stability. Regularly inspect and tighten connections to prevent loosening over time. Properly secured connections are essential for safe and effective training. Always refer to the manual for specific guidance.

With these steps completed, your Everlast Heavy Bag Stand is ready for use. Ensure durability by maintaining it properly and enjoy your training sessions safely and effectively.

Final Checks Before First Use

Before using your Everlast Heavy Bag Stand, perform a thorough inspection to ensure all bolts and screws are tightened securely. Verify that the stand is stable and evenly balanced. Check that all weight plates are properly attached for added stability. Double-check that the heavy bag is securely mounted and that the area around the stand is clear of obstacles. Ensure all safety precautions are in place to prevent accidents during use. Once satisfied, your stand is ready for a safe and effective training experience.

Enjoying Your Everlast Heavy Bag Stand

With your Everlast Heavy Bag Stand fully assembled and stabilized, you’re ready to enjoy a premium training experience. The stand’s sturdy design and adjustable features allow for versatile workouts, whether you’re focusing on boxing, MMA, or general fitness. Customize your training sessions with different heavy bags or speed bags, and take advantage of the stand’s durability to push your limits. Consistent use will help improve your striking skills, endurance, and overall physical conditioning. Make the most of your investment and enjoy the satisfaction of productive, high-quality training sessions.

aldi pancake mix instructions

Aldi’s pancake mix offers a convenient, affordable, and versatile solution for delicious breakfasts. Available in buttermilk, protein, and gluten-free varieties, it ensures consistent results with minimal effort.

Overview of Aldi Pancake Mix Varieties

Aldi offers a diverse range of pancake mixes to suit various preferences and dietary needs. Their Aunt Maple’s Buttermilk Pancake Mix is a classic choice, providing a light and fluffy texture with a subtle tang. For health-conscious consumers, the Millville Protein Oat Pancake Mix combines high-quality protein with whole grain oats for a nutritious breakfast option. The liveGfree Gluten-Free Pancake Mix is another excellent option, catering to those with gluten intolerance while maintaining great taste and texture. Additionally, many of these mixes can be used to make both pancakes and waffles, offering versatility for different meals. Aldi’s pancake mixes are not only affordable but also deliver high-quality results, making them a popular choice for many households.

Why Choose Aldi Pancake Mix?

Aldi Pancake Mix is a top choice for home cooks due to its convenience, affordability, and versatility. It offers a quick and easy solution for breakfast or brunch, requiring only a few ingredients like water or milk. The mix is budget-friendly while maintaining high-quality results, ensuring fluffy and delicious pancakes every time. With options like buttermilk, protein, and gluten-free varieties, it caters to diverse dietary preferences. Additionally, the mix can be customized with add-ins like chocolate chips or fruit for extra flavor. Many users praise its ability to deliver homemade-quality pancakes without the hassle of measuring multiple ingredients. Its simplicity and consistent results make it a favorite for both busy households and those seeking a hassle-free breakfast solution.

Basic Instructions for Making Pancakes

Mix Aldi pancake mix with water or milk, heat a greased griddle, and cook batter until bubbles form. Flip and cook the other side until golden brown.

Ingredients and Equipment Needed

To make delicious pancakes using Aldi pancake mix, you’ll need a few simple ingredients and tools. Start with the Aldi pancake mix itself, available in varieties like buttermilk, protein, or gluten-free. Add water or milk as specified on the box for the desired consistency. For extra fluffiness, some recipes suggest adding eggs, vanilla extract, or a pinch of salt. Equipment-wise, you’ll need a large bowl for mixing, a whisk or spoon, a measuring cup, and a greased griddle or skillet heated to medium-high heat (around 375°F). A spatula is essential for flipping, and a 1/4 cup scoop helps portion the batter evenly. Optional additions like mix-ins (chocolate chips, fruit, or nuts) can enhance flavor. Ensure all tools are ready before starting for a smooth, hassle-free process.

Step-by-Step Mixing and Cooking Guide

Start by preheating your griddle or skillet over medium-high heat or to 375°F, lightly greasing it with oil or butter. In a bowl, combine the Aldi pancake mix with the recommended amount of water or milk. Stir until lumps disappear, but avoid overmixing to ensure tender pancakes. For extra fluffiness, beat in an egg or add a splash of vanilla. Using a 1/4 cup scoop, pour batter onto the heated griddle. Cook for 2-3 minutes until bubbles form on the surface and edges look set. Flip gently and cook another 1-2 minutes until golden brown. Repeat until all batter is used, adjusting heat as needed to prevent burning. Serve warm with your favorite toppings like syrup, fruit, or whipped cream for a perfect breakfast or brunch.

Customizing Your Pancake Mix

Elevate your pancakes by adding mix-ins like chocolate chips, fresh berries, or nuts for extra flavor. Experiment with spices or substitute ingredients for a healthier twist.

Adding Mix-Ins for Extra Flavor

Enhance your pancakes by incorporating mix-ins to create unique flavor profiles. Try adding fresh berries like blueberries or strawberries for a fruity twist, or chocolate chips for a sweet indulgence. Nuts, such as walnuts or pecans, add a satisfying crunch. For a festive touch, mix in crushed candy canes during the holidays or sprinkles for a colorful surprise. Folding in diced bananas or apples can add natural sweetness and moisture. Even a drizzle of vanilla extract or a pinch of cinnamon can elevate the taste. These simple additions transform a basic batter into a gourmet treat, making every batch special and delicious.

Healthier Modifications to the Recipe

Make your pancakes healthier by substituting or adding nutrient-rich ingredients. Replace water with milk or plant-based alternatives like almond or oat milk for added creaminess. Add a tablespoon of honey or maple syrup instead of sugar for natural sweetness. Incorporate oats or whole wheat flour for extra fiber. Use egg whites instead of whole eggs to reduce cholesterol. For a protein boost, mix in Greek yogurt or a scoop of protein powder. Fold in fresh fruit like berries or bananas for vitamins and antioxidants. These modifications enhance the nutritional value while maintaining a delicious flavor, allowing you to enjoy a guilt-free breakfast.

Tips for the Perfect Pancakes

Ensure the pan is hot, use the right batter amount, and avoid overmixing. Cook until bubbles form, then flip for a golden finish. Let batter rest for fluffiness.

Expert Tips for Fluffier Pancakes

To achieve the fluffiest pancakes using Aldi pancake mix, try these expert tips: Use milk instead of water for added richness and moisture. Add an extra egg to the batter for a lighter texture. Let the batter rest for 3-4 minutes to allow the mix to bloom. Avoid overmixing, as it can make pancakes dense. Heat your pan properly and cook until bubbles form on the surface. Flip gently and cook until golden. These simple adjustments elevate your pancakes to a whole new level of fluffiness and flavor!

Common Mistakes to Avoid

When using Aldi pancake mix, avoid these common mistakes for the best results. Overmixing the batter can lead to dense pancakes—mix wet and dry ingredients separately and fold gently. Using water instead of milk reduces moisture and flavor. Overheating the griddle can burn the pancakes; maintain a medium heat. Cooking too long on the first side can make them dry; flip once bubbles form. Don’t open the batter too soon, as this deflates air pockets. Lastly, avoid overcrowding the pan, as this prevents even cooking. By avoiding these errors, you’ll achieve lighter, fluffier pancakes every time.

Using Aldi Pancake Mix Beyond Pancakes

Aldi pancake mix isn’t just for pancakes. It’s perfect for making delicious waffles and can be used in creative recipes like coffee cake and more.

Waffle Making Instructions

To make delicious waffles using Aldi pancake mix, follow these simple steps. Start by preheating your waffle iron according to the manufacturer’s instructions. Lightly grease the iron with oil or cooking spray to prevent sticking. In a bowl, combine the pancake mix with water and a tablespoon of oil, mixing until lumps are gone. Allow the batter to sit for 3-4 minutes to let the ingredients bloom. Pour the recommended amount of batter onto the center of the waffle iron, spreading it evenly to cover the surface. Cook until the waffles are golden brown and crispy. Repeat until all batter is used. Serve warm with your favorite toppings, such as syrup, fruit, or whipped cream, for a tasty breakfast or brunch option. This method ensures fluffy and flavorful waffles every time.

Creative Recipes Using the Mix

Beyond pancakes and waffles, Aldi pancake mix can be transformed into exciting dishes. Try adding mix-ins like chocolate chips, nuts, or fruit for a personalized touch. For a festive twist, incorporate crushed candy canes or cinnamon for seasonal flavor. The mix also works well for coffee cake—simply add toppings like streusel or fruit. Additionally, some users have successfully used the mix as a coating for pork chops, blending it with spices for a crispy exterior. Experiment with adding vanilla extract or a drizzle of brown sugar for enhanced sweetness. These creative ideas showcase the versatility of Aldi pancake mix, allowing you to go beyond breakfast and explore sweet and savory possibilities effortlessly.

form 5310 instructions

Form 5310 is used by plan sponsors of terminating defined contribution or benefit plans to request an IRS determination letter on the plan’s qualified status․ It is optional but recommended for ensuring compliance and certainty upon plan termination․ The IRS periodically updates the form’s instructions, with recent changes in 2021 expanding its scope to include 403(b) plans and requiring electronic submission through Pay․gov․ The user fee for filing Form 5310 increased to $3,000 in 2019, reflecting its importance in the plan termination process․

What is Form 5310?

Form 5310, Application for Determination for Terminating Plan, is a document used by employers to request an IRS determination letter regarding the qualified status of a terminating retirement plan․ It applies to both defined contribution and defined benefit plans, ensuring compliance with IRS regulations upon plan termination․ The form is optional but highly recommended to confirm the plan’s qualification status under sections 401(a) or 403(a) of the Internal Revenue Code․ Recent updates include expanded scope for 403(b) plans and mandatory electronic submission through Pay․gov․

Purpose of Form 5310

Form 5310 is used to request an IRS determination letter regarding the qualified status of a terminating retirement plan under Sections 401(a) or 403(a)․ Its purpose is to ensure the plan meets IRS standards at termination, providing certainty for plan sponsors․ The form is optional but recommended for confirming compliance and avoiding potential issues․ Recent updates expanded its scope to include 403(b) plans, aligning procedures with qualified plans and requiring electronic submission through Pay․gov for streamlined processing․

Eligibility and Requirements

Form 5310 is for plan sponsors of terminating defined contribution or benefit plans seeking IRS determination․ Eligibility includes plans under Sections 401(a) or 403(a)․ Submission requires registration on Pay․gov, and attachments must be consolidated into a single PDF for upload․ The form is optional but recommended for ensuring compliance and certainty during plan termination․ Recent updates align procedures with qualified plans, streamlining the process for plan sponsors․

Who Can File Form 5310?

Form 5310 can be filed by plan sponsors or administrators of terminating defined contribution or defined benefit plans under Sections 401(a) or 403(a) of the Internal Revenue Code․ It is typically submitted by employers or plan administrators seeking an IRS determination letter regarding the qualified status of their plan upon termination․ The form is optional but highly recommended for ensuring compliance and avoiding potential issues related to plan disqualification․ Filing requires registration on Pay․gov, and a user fee of $3,000 applies as of July 1, 2019․

When to File Form 5310

Form 5310 should be filed when a defined contribution or benefit plan is terminating, ensuring the IRS can review the plan’s qualified status․ The filing is optional but recommended for clarity and compliance․ The IRS requires submission through Pay․gov, with a user fee of $3,000 as of July 1, 2019․ Plan sponsors must file within 12 months after the plan’s termination date to avoid penalties and ensure proper documentation of the plan’s final status․

Submission Process

Form 5310 must be submitted electronically via Pay․gov․ Register for an account, search for Form 5310, complete it, and upload all attachments as a single PDF file․

How to Submit Form 5310

To submit Form 5310, register for a Pay․gov account and search for Form 5310․ Complete the form online, ensuring all required fields are filled accurately․ Attachments must be consolidated into a single PDF file for upload․ The filing fee, currently $3,000, must be paid during submission․ Once completed, review and submit the form electronically․ Note that submission is optional but recommended for plans seeking IRS determination upon termination․ Ensure compliance with all instructions to avoid delays or rejection․

Filing Fee and Payment Instructions

The filing fee for Form 5310 is currently $3,000, increased from $2,300 as of July 1, 2019․ This fee must be paid electronically through Pay․gov during the submission process․ The payment covers the IRS determination request for the plan’s qualified status upon termination․ Ensure the fee is paid in full to avoid processing delays․ Note that the fee is non-refundable, regardless of the IRS determination outcome․ Payment confirmation will be provided upon successful submission of the form․

Documentation and Attachments

Form 5310 requires specific documentation, including the plan document, amendments, and notices to interested parties․ All attachments must be consolidated into a single PDF for upload․

Required Documents for Form 5310

Filing Form 5310 requires specific documentation, including the plan document, all amendments, and evidence of proper plan administration․ A notice to interested parties, such as plan participants, must also be provided․ Additionally, the submission must include a signed copy of the form and any supporting documents that demonstrate compliance with IRS regulations․ Ensuring all required documents are complete and accurate is crucial for a successful determination letter request․ Missing documents may delay processing or result in rejection of the application․

Formatting and Upload Guidelines

Form 5310 must be submitted electronically through Pay․gov․ Users must create an account, search for Form 5310, and complete the form online․ All attachments must be consolidated into a single PDF file, as Pay․gov only accommodates one uploaded file․ Proper formatting and adherence to these guidelines are essential to avoid processing delays․ Ensure all documents are clear, complete, and in the correct format before submission to facilitate a smooth review process by the IRS․

Legal and Compliance Considerations

Filing Form 5310 ensures compliance with IRS regulations, confirming a plan’s qualified status under Section 401(a) or 403(a)․ A determination letter provides legal certainty, protecting plan sponsors from potential disputes and ensuring adherence to federal tax laws․ Consulting legal counsel is advisable to navigate complexities and risks associated with plan termination and compliance requirements․

Importance of Determination Letter

A determination letter from the IRS confirms a terminating plan’s qualified status under Section 401(a) or 403(a)․ It provides legal certainty, ensuring compliance with federal tax laws and protecting plan sponsors from disputes․ The letter verifies that the plan meets all regulatory requirements at termination, offering reassurance to stakeholders․ It also serves as official documentation, which may be required for audits or other legal proceedings․ Obtaining this letter is a critical step in the plan termination process․

Risk Assessment and Legal Implications

Filing Form 5310 involves assessing risks related to non-compliance with IRS regulations․ Failure to meet requirements may result in penalties or loss of tax-qualified status․ Legal implications include potential disputes over plan termination and beneficiary rights․ The determination letter provides legal certainty, minimizing risks and ensuring compliance․ The $3,000 user fee underscores the seriousness of the process, requiring careful preparation and adherence to guidelines to avoid legal challenges and financial repercussions․

Timeline and Deadlines

Form 5310 must be submitted by the plan’s termination date․ The IRS requires electronic filing through Pay․gov, with a $3,000 fee as of July 1, 2019․

Key Dates for Filing Form 5310

Form 5310 must be filed by the plan’s termination date to ensure timely processing․ The IRS increased the filing fee to $3,000 effective July 1, 2019․ Electronic submission through Pay․gov became mandatory as of April 16, 2021․ Plan sponsors should submit the form promptly to avoid delays․ Deadlines are critical to maintaining compliance and avoiding penalties․ Proper planning ensures all requirements are met before the termination date, facilitating a smooth process․ Timely filing is essential for obtaining the determination letter․

Consequences of Late Submission

Late submission of Form 5310 may result in penalties, delays in plan termination, and potential loss of qualified status․ The IRS may impose fines for missing deadlines, and the plan could face legal implications․ Failure to file timely may also complicate asset distribution and affect participants’ benefits․ It is crucial to adhere to the specified timelines to avoid these consequences and ensure a smooth termination process, maintaining compliance with IRS regulations and safeguarding plan integrity․

Post-Submission Procedures

After submitting Form 5310, await IRS review․ If approved, a determination letter is issued, confirming the plan’s qualified status․ Be prepared to provide additional information upon request․

What Happens After Filing Form 5310

After submitting Form 5310, the IRS reviews the application to determine the plan’s qualified status․ If approved, a determination letter is issued, confirming compliance with IRS requirements․ This letter is essential for ensuring the plan’s termination is legally valid and distributes assets appropriately․ The determination letter must be received before final distribution of plan assets․ The IRS may request additional information during the review process, which must be promptly addressed to avoid delays․ The filing fee for Form 5310 is $3,000, reflecting the significance of this compliance step․

Handling IRS Requests for Additional Information

If the IRS requests additional information after filing Form 5310, respond promptly to avoid delays․ The IRS typically allows 30 days to provide the requested documents or clarifications․ Ensure all submissions are complete and accurately address the IRS’s concerns․ Failure to respond timely may result in processing delays or denial of the determination letter․ Maintain clear communication and consult with legal or tax professionals if needed to ensure compliance and resolve issues efficiently․

Recent Updates and Changes

The IRS updated Form 5310 instructions to include 403(b) plans, requiring electronic submission via Pay․gov as of April 26, 2021, with a $3,000 fee increase effective July 1, 2019․

Latest Instructions and Revisions

The IRS released updated instructions for Form 5310, expanding its scope to include 403(b) plans and mandating electronic submission through Pay․gov starting April 26, 2021․ The revisions align Form 5310 processes with those of 401(a) plans, streamlining procedures for plan sponsors․ Additionally, the user fee increased to $3,000 in 2019, reflecting the form’s critical role in ensuring compliance during plan termination․ These changes aim to enhance clarity and efficiency for filers․

Impact of Regulatory Changes on Form 5310

Recent regulatory changes have significantly impacted Form 5310, including the mandatory electronic submission through Pay․gov as of April 26, 2021․ The form now includes 403(b) plans, aligning its requirements with those of 401(a) plans․ Additionally, the filing fee increased to $3,000 in 2019, underscoring the form’s importance in ensuring compliance during plan termination․ These updates aim to streamline the process, enhance clarity, and ensure proper handling of terminating plans under current regulatory standards․

Best Practices and Tips

Plan sponsors should consult legal counsel to ensure compliance and assess risks before filing Form 5310․ Careful preparation and understanding of the form’s implications are crucial․

Common Mistakes to Avoid

Common mistakes include incomplete or inaccurate information, failure to consolidate attachments into a single PDF, and missing deadlines․ Ensure all required documents are included and verify the filing fee․ Properly registering on Pay․gov and selecting the correct form are essential․ Avoid late submissions, as penalties may apply․ Consult with legal counsel to ensure compliance and prevent errors in the determination letter request process for Form 5310․

Efficient Completion of Form 5310

To efficiently complete Form 5310, ensure all required documents are prepared in advance․ Consolidate attachments into a single PDF to avoid multiple uploads․ Register on Pay․gov early to avoid delays․ Double-check the form for accuracy and completeness before submission․ Pay the required user fee of $3,000 promptly․ Familiarize yourself with the updated instructions and seek professional assistance if needed to streamline the process and ensure compliance with IRS requirements․

Additional Resources and Support

Visit IRS․gov for official guidelines and publications on Form 5310․ Utilize Pay․gov for submission support and consult professionals for complex cases to ensure compliance and accuracy․

IRS Guidelines and Publications

The IRS provides detailed guidelines and publications on Form 5310 through their official website, IRS․gov․ These resources include updated instructions, user fees, and submission requirements․ Plan sponsors can access Form 5310, along with its instructions, to ensure compliance with regulatory standards․ Additionally, the IRS offers publications that explain the determination letter process and the importance of submitting Form 5310 for terminating plans․ Visit IRS․gov/OrderForms to obtain necessary materials or consult IRS representatives for clarification․

Professional Assistance and Consultation

Consulting with tax professionals or plan administrators is crucial for navigating the complexities of Form 5310․ Experts can provide guidance on updated instructions, ensure compliance with IRS regulations, and help interpret legal implications․ Plan sponsors should seek advice from experienced practitioners to avoid errors and ensure timely submission․ Additionally, professional consultation can clarify specific requirements, such as the $3,000 filing fee and electronic submission via Pay․gov, ensuring a smooth process for obtaining a determination letter․

ruger american trigger adjustment instructions

The Ruger American Rifle’s trigger adjustment allows shooters to customize their firearm for a smoother‚ more precise shooting experience. Online guides provide detailed optimization steps for owners.

Overview of the Ruger American Rifle Trigger System

The Ruger American Rifle features a user-adjustable trigger system designed for precision and reliability. It includes pre-travel and overtravel adjustment screws‚ allowing shooters to customize the trigger pull to their preference. The system also incorporates a sear engagement screw to ensure consistent and safe functionality. Polishing key components‚ such as the trigger return spring tunnel and transfer bar‚ can further enhance the trigger’s smoothness. This modular design makes it accessible for owners to fine-tune their rifle’s performance without specialized tools‚ ensuring a tailored shooting experience.

Tools and Materials Needed for Trigger Adjustment

Essential tools include screwdrivers‚ punches‚ and a torque wrench. Polishing materials like fine sandpaper and lubricants are recommended for smoothing trigger components. Safety gear is a must.

Essential Tools: Screwdrivers‚ Punches‚ and Other Hardware

Adjusting the Ruger American Rifle trigger requires a flathead screwdriver for pre-travel and overtravel screws. A punch is needed to remove trigger pins. Hex keys or Torx drivers may be necessary for specific adjustments. Additional tools include a small hammer for gentle tapping and safety gear like safety glasses. Ensure all tools are of high quality to avoid damaging the firearm. Proper tool selection is critical for safe and effective trigger customization‚ as outlined in online tutorials and forums. Always refer to the manufacturer’s guidelines for compatibility and safety.

Recommended Materials for Polishing and Lubrication

Recommended Materials for Polishing and Lublication

For polishing the trigger components‚ use jeweler’s rouge or fine-grit sandpaper to smooth surfaces. Apply a high-quality gun oil or silicone-based lubricant to reduce friction and prevent wear. Avoid petroleum-based products‚ as they can attract dust. Polishing the trigger return spring tunnel and sear engagement areas ensures a smoother trigger pull. Proper lubrication enhances reliability and maintains the rifle’s performance. Always follow safety guidelines when handling firearms and use materials compatible with gun parts to avoid damage.

Safety Precautions Before Starting the Adjustment

Ensure the rifle is completely unloaded and double-check the chamber. Wear safety glasses and use proper tools to avoid accidental discharge or injury during adjustment.

Ensuring the Rifle is Unloaded and Safe to Work On

Begin by ensuring the rifle is completely unloaded. Remove the magazine and verify the chamber is empty. Use a chamber flag to visually confirm the firearm is safe. Always handle the rifle with the muzzle pointed in a safe direction. Double-check the firearm’s condition before starting any adjustments. If unsure‚ consult the owner’s manual or seek professional guidance to ensure safety throughout the process.

Wearing Protective Gear and Following Proper Procedures

Always wear safety glasses and gloves when working on your rifle to protect yourself from potential debris or accidental discharge. Ensure the rifle is unloaded and secured in a vice or safe working area. Follow proper gunsmithing practices‚ such as avoiding loose clothing or jewelry that could interfere with tools. Work in a well-lit‚ stable environment‚ and keep the muzzle pointed in a safe direction at all times. Never proceed without confirming the firearm is unloaded and safe to handle.

Understanding the Trigger Adjustment Screws

The Ruger American Rifle features adjustment screws for pre-travel‚ overtravel‚ and sear engagement. These screws allow precise customization of trigger pull and reset characteristics for optimal performance.

Identifying the Pre-Travel and Overtravel Adjustment Screws

The pre-travel adjustment screw‚ located nearest the muzzle‚ controls the trigger’s movement before it engages the sear. Turning it clockwise reduces pre-travel‚ while counterclockwise increases it. The overtravel screw‚ situated farther from the muzzle‚ adjusts how much the trigger moves rearward after firing. Proper adjustment ensures a crisp‚ responsive trigger pull without compromising safety. Always refer to the owner’s manual for specific guidance to avoid accidental discharge or malfunction.

Explaining the Role of the Sear Engagement Screw

The sear engagement screw‚ located farthest from the receiver‚ regulates the trigger’s interaction with the sear. Turning it clockwise increases sear engagement‚ enhancing safety by preventing accidental discharge. Counterclockwise reduces engagement‚ lightening the trigger pull. Proper adjustment ensures a smooth‚ crisp trigger without compromising reliability. Over-adjustment can lead to misfires‚ so careful calibration is essential. Always follow manufacturer guidelines to maintain safety and functionality.

Step-by-Step Guide to Adjusting the Trigger

Begin by removing the action from the stock to access the trigger mechanism. Adjust the overtravel and pre-travel screws to achieve your desired trigger pull weight and feel.

Removing the Action from the Stock

To access the trigger mechanism‚ start by removing the action from the stock. This involves taking out the stock screws located near the front and rear of the action. Gently lift the action away from the stock‚ ensuring no components are damaged. Once removed‚ the trigger system will be exposed for adjustment. Be sure to handle the action carefully and keep it on a clean‚ stable surface during the process. This step is crucial for safely modifying the trigger components.

Accessing and Adjusting the Trigger Mechanism

After removing the action‚ locate the trigger adjustment screws. The screw closest to the muzzle controls overtravel‚ while the screw farther back adjusts pre-travel. Turn these screws clockwise to reduce overtravel or pre-travel‚ ensuring not to over-tighten. Use a screwdriver to make precise adjustments‚ testing the trigger repeatedly for smooth operation. Be cautious not to alter the sear engagement‚ as this can affect safety. Keep the workspace clean and well-lit to avoid losing small parts during the process.

Polishing the Trigger Components for Smoother Operation

Polishing the trigger components enhances functionality. Focus on the trigger return spring tunnel and transfer bar for a smoother pull. Lightly polish with fine grit sandpaper or a polishing stone‚ ensuring surfaces remain clean and free of debris. This process reduces friction and improves the overall trigger feel without altering safety mechanisms. Always work in a well-lit‚ organized workspace to maintain precision and avoid losing small parts.

Polishing the Trigger Return Spring Tunnel

Polishing the trigger return spring tunnel is crucial for reducing friction and ensuring smooth operation. Use a fine-grit sandpaper or polishing stone to gently smooth the interior surfaces. Remove any debris or rough edges that may cause resistance. After polishing‚ apply a small amount of high-quality lubricant to maintain functionality. This step enhances the trigger’s overall performance without compromising safety or reliability. Ensure the area is clean and free of residue before reassembly.

Smoothing the Transfer Bar and Pawl

Smoothing the transfer bar and pawl enhances trigger performance by reducing friction and wear. Use a fine-grit sandpaper or polishing stone to gently buff the surfaces‚ focusing on contact points. This process eliminates sharp edges and burrs‚ ensuring a smoother trigger pull. Be cautious not to over-polish‚ as it may affect functionality. After polishing‚ apply a light coat of lubricant to maintain smooth operation. Properly smoothed components will result in a crisper‚ more consistent trigger reset and improved overall feel.

Reassembling the Rifle After Trigger Adjustment

Reassemble the rifle by reversing the disassembly steps‚ ensuring proper alignment and secure fastening of all components. Reinstall the trigger and action‚ then test functionality.

Properly Reinstalling the Trigger and Action

After adjusting the trigger‚ carefully reinstall the trigger assembly into the receiver‚ ensuring all components align correctly. Secure the action back into the stock using the original screws‚ tightening them evenly. Double-check that all parts are properly seated and fastened to avoid any shifting during use. Once reassembled‚ cycle the action and test the trigger to ensure smooth operation and proper functionality. Verify that the safety operates correctly and the trigger pull meets your adjusted specifications.

Testing the Trigger Functionality

After reassembly‚ test the trigger functionality by dry-firing the rifle to ensure smooth operation. Check for proper trigger reset and consistent pull weight. Verify that overtravel is minimized and the safety operates correctly. Conduct these tests with the rifle unloaded to ensure safety. If adjustments are needed‚ fine-tune the screws as described. Online guides‚ such as those from Gunsite Academy‚ provide additional tips for verifying trigger performance and ensuring optimal functionality.

Troubleshooting Common Issues After Adjustment

Common issues after trigger adjustment include inconsistent pull weight or overtravel. Check screw adjustments and ensure proper reassembly. Consult online guides for detailed solutions to resolve these problems effectively.

Addressing Trigger Pull Issues

Trigger pull issues‚ such as excessive weight or grittiness‚ can arise after adjustment. Ensure the sear engagement screw is properly set without over-tightening. Lightly polishing the sear‚ trigger return spring tunnel‚ and transfer bar can smooth the action. Apply a small amount of high-quality gun oil to moving parts. If problems persist‚ verify that all screws are correctly adjusted and the rifle is reassembled properly. Consulting online guides or seeking professional assistance can help resolve persistent issues effectively.

Fixing Overtravel or Pre-Travel Problems

Overtravel and pre-travel issues can be resolved by adjusting the specific screws. The screw closest to the muzzle adjusts overtravel; turning it in reduces overtravel‚ but over-tightening can prevent firing. For pre-travel‚ adjust the screw near the receiver to set the desired trigger engagement. Ensure adjustments are made incrementally and tested after each change. If problems persist‚ consult detailed online guides or seek professional assistance. Proper adjustment ensures a crisp‚ reliable trigger function without compromising safety.

mopar electronic ignition conversion instructions

Mopar electronic ignition conversion enhances vehicle performance and reliability by upgrading traditional points-based systems to modern electronic ignition. This transition simplifies wiring and improves overall engine efficiency.

Why Convert to Electronic Ignition?

Converting to electronic ignition modernizes your Mopar’s outdated points-based system, eliminating mechanical wear and tear. Electronic systems offer consistent spark delivery, reduced maintenance, and improved reliability. They also simplify wiring by removing the external ignition box, reducing potential failure points. This upgrade enhances overall engine performance, making it a practical choice for both classic and modern Mopar vehicles seeking better efficiency and durability.

Overview of Mopar Ignition Systems

Mopar ignition systems traditionally rely on a points-based distributor, which, while effective, can be less reliable and require more maintenance. Modern electronic ignition systems are increasingly popular for their improved performance and reliability. These systems eliminate the mechanical points, reducing wear and tear and enhancing spark consistency. Understanding the basics of Mopar ignition systems is crucial for a smooth transition to electronic ignition, ensuring optimal engine operation and longevity.

Benefits of Electronic Ignition Conversion

Electronic ignition conversion offers improved reliability, enhanced performance, and simplified wiring. It eliminates mechanical wear, reduces maintenance, and provides consistent spark for better engine operation and efficiency.

Improved Reliability

Electronic ignition conversion enhances reliability by eliminating mechanical components prone to wear and tear. Points-based systems can fail over time, but electronic ignition ensures consistent spark delivery. This reduces maintenance needs and minimizes the risk of ignition-related breakdowns, providing a more dependable engine operation overall.

Enhanced Performance

Electronic ignition conversion boosts engine performance by ensuring a consistent and precise spark, which optimizes combustion. This results in smoother acceleration, better throttle response, and increased horsepower. The elimination of misfires and consistent energy delivery across all cylinders further enhances overall performance, making it ideal for both daily driving and high-performance applications while reducing emissions.

Simplified Wiring

Electronic ignition conversion significantly simplifies wiring by eliminating the need for an external ignition box and ballast resistor. This reduction in components minimizes potential failure points and streamlines the system. Pre-labeled wires in conversion kits ensure a straightforward installation process, reducing the risk of wiring errors and making the system more reliable and easier to maintain over time.

Understanding the Components Involved

The electronic ignition system includes key components like the ignition module, coil, distributor cap, and rotor. These parts work together to generate and distribute the spark needed for engine operation.

Ignition Module

The ignition module is the brain of the electronic ignition system, responsible for generating the high voltage needed for spark production. It replaces traditional points and condenser setups, offering improved reliability and reduced maintenance. Modern modules provide consistent spark output, adapt to engine conditions, and integrate seamlessly with the coil and distributor. Proper installation ensures optimal performance and longevity of the ignition system.

Coil

The coil is a critical component in the electronic ignition system, serving as a transformer to step up voltage for spark production; Modern coils, such as those used in HEI systems, offer improved efficiency and reliability compared to older models. Proper installation and connection ensure consistent spark output, reducing energy loss and enhancing overall ignition system performance. Regular inspection is recommended to maintain optimal functionality.

Distributor Cap and Rotor

The distributor cap and rotor are essential for directing the spark to the correct cylinder. Upgrading these components ensures proper spark distribution and prevents misfires. Modern designs offer improved durability and resistance to wear. Proper alignment during installation is crucial for maintaining consistent engine performance and avoiding ignition-related issues. Regular inspection and cleaning can extend their lifespan and ensure reliable operation;

Gathering Tools and Materials

Collect essential tools like wrenches, screwdrivers, and a multimeter. Gather materials such as ignition modules, coils, wiring harness, and conversion kits. Ensure all components are compatible with your Mopar system for a smooth installation process. Consult the conversion kit list to verify all necessary parts are included before starting the project.

Essential Tools for the Conversion

Gather a set of basic tools, including wrenches, screwdrivers, pliers, and a multimeter. Wire strippers and crimpers are necessary for wiring connections. A torque wrench ensures proper bolt tightening. Pliers and punches may be needed for older systems. Additionally, a spark tester can help diagnose ignition issues, and a digital multimeter is useful for verifying electrical connections. Having these tools ready simplifies the conversion process and ensures accuracy.

Required Parts and Accessories

Key components include a Mopar electronic distributor, ignition module, and compatible coil. A high-quality wiring harness is essential for proper connections. Spark plug wires, spark plugs, and a capacitor may also be needed. Ensure all parts are compatible with your vehicle’s make and model. These components ensure a smooth and reliable conversion, preventing potential electrical issues during the process.

Choosing the Right Conversion Kit

Selecting the correct Mopar electronic ignition conversion kit ensures compatibility and reliability. Look for kits designed for your vehicle’s specific make and model, including necessary components for a seamless install.

Key Features to Look For

When selecting a Mopar electronic ignition conversion kit, prioritize compatibility with your vehicle’s specific make and model. Ensure the kit includes essential components like an ignition module, coil, and wiring harness. Look for durable, high-quality materials and straightforward installation instructions. Optional features such as adjustable timing and built-in diagnostic capabilities can enhance performance and troubleshooting. Verify that the kit is designed for your engine type to guarantee a seamless installation and optimal functionality.

Popular Mopar Conversion Kits

Popular Mopar electronic ignition conversion kits include the MSD HEI-style ignition conversion and the Holley Sniper HEI kit. These kits are known for their compatibility with Mopar engines and offer improved performance. The MSD kit features a high-quality ignition module and coil, while the Holley Sniper is renowned for its all-in-one design and adjustable timing capabilities. Both kits are durable and designed for easy installation, making them top choices for enthusiasts. Always research the specifications to ensure compatibility with your Mopar engine.

Preparing the Vehicle for Conversion

Begin by disconnecting the battery to ensure safety and prevent accidental engine start. Next, remove the old ignition system, including the distributor cap and rotor, to prepare for the electronic upgrade. Labeling wires and cleaning the area around the ignition system is also crucial for a smooth conversion process.

Disconnecting the Battery

Always start by disconnecting the negative battery terminal to ensure safety and prevent accidental engine start. Locate the negative terminal, typically marked with a “-” sign, and loosen it with a wrench. Completely remove the terminal from the battery post to disconnect it. This step prevents any electrical current from flowing during the conversion process. Use a multimeter to verify no voltage is present before proceeding. Secure the disconnected cable to prevent it from accidentally reconnecting while working on the vehicle.

Removing the Old Ignition System

Start by disconnecting the battery to ensure safety. Next, disable the ignition system by removing the distributor cap and rotor. Gently pull the distributor wires from the spark plugs, taking care not to damage them. Remove the ignition coil by disconnecting its wiring harness and bolts. Finally, extract the old ignition module and any associated components. Store removed parts securely for potential future use or disposal.

Installing the Electronic Ignition Module

Mount the electronic ignition module securely in the designated location. Connect the wiring harness as per manufacturer’s specifications. Ensure all connections are secure and proper function is achieved by following installation guidelines carefully.

Mounting the Module

Locate the module’s designated mounting area, typically near the distributor. Clean the surface thoroughly before installation. Use the provided adhesive or screws to secure the module firmly. Ensure the module is tightly fastened to prevent vibration damage. Follow manufacturer guidelines for proper orientation and alignment. Double-check the module’s position to avoid interference with other engine components.

Connecting Wires

  • Identify the ignition module’s wiring harness and connect it to the distributor cap.
  • Attach the positive coil wire to the ignition coil, ensuring a secure connection.
  • Connect the negative coil wire to the module’s designated terminal.
  • Link the tachometer wire to the appropriate terminal for accurate RPM readings.
  • Ensure all connections are tight and properly insulated to prevent interference.

Testing and Fine-Tuning

Start the engine to ensure proper operation. Check for misfires or unusual noises. Adjust ignition timing and module settings as needed for optimal performance and reliability.

Initial Start-Up

After installing the electronic ignition module, reconnect the battery and start the engine. Listen for smooth operation and ensure there are no misfires or unusual noises. Check the tachometer to confirm stable RPMs at idle. Verify that the ignition module is functioning correctly by monitoring dash lights or diagnostic tools for any error codes. A successful start indicates the system is operational and ready for further tuning.

Adjusting Settings

After the initial start-up, fine-tune the electronic ignition module to optimize performance. Adjust the timing and dwell angle using a timing light or scan tool for precision. Ensure proper spark output by verifying coil resistance and capacitor settings. Fine-tune the ignition curve for improved performance under various driving conditions. Refer to the conversion kit’s manual for specific adjustment guidelines tailored to your Mopar system.

Troubleshooting Common Issues

Identify ignition-related problems by checking for spark, verifying wiring connections, and ensuring the module functions correctly. Address common issues like misfires or faulty sensors promptly to maintain performance.

Diagnosing Ignition Problems

Diagnosing ignition issues involves checking for spark at the spark plugs, ensuring proper wiring connections, and verifying the ignition module’s functionality. Use a multimeter to test voltage at the coil and module. Check for error codes using a scan tool if equipped. Inspect the distributor cap and rotor for wear or cracks. Addressing these areas helps pinpoint common problems like misfires or faulty sensors, ensuring reliable engine operation and performance.

Fixing Wiring and Connection Errors

Begin by inspecting all wiring for damage or corrosion. Use a multimeter to test for proper voltage and continuity. Ensure all connections are secure and free from debris. Replace any faulty wires or connectors. Verify compatibility between components, such as the ignition module and coil. Consult a wiring diagram for accuracy. Properly route and secure wires to prevent interference and ensure reliable operation. This step is crucial for avoiding ignition failures and maintaining performance.

Mopar electronic ignition conversion is a straightforward upgrade that enhances reliability, performance, and simplicity. Proper planning and execution ensure a smooth transition to modern ignition systems, improving overall vehicle efficiency and longevity.

Final Tips for a Successful Conversion

Plan meticulously, use high-quality components, and follow instructions closely. Double-check wiring connections and ensure proper grounding. Test the system thoroughly after installation. Consult forums or manuals for troubleshooting common issues. Regular maintenance, like inspecting spark plugs and wires, will ensure long-term reliability and optimal performance. Attention to detail guarantees a smooth and successful electronic ignition conversion for your Mopar vehicle.

Long-Term Maintenance

Regularly inspect spark plugs, wires, and the distributor cap for wear or damage. Clean or replace components as needed to maintain optimal performance. Check the ignition module and wiring connections annually for corrosion or loose links. Schedule periodic tune-ups to ensure the electronic ignition system operates efficiently. Proper upkeep extends the lifespan of your Mopar’s ignition system and prevents unexpected issues down the road.

extraction post op instructions in spanish

Overview of Post-Extraction Care in Spanish

Proper post-extraction care is essential for healing after tooth removal․ Protecting the blood clot, avoiding disruptive activities, and maintaining oral hygiene are key to preventing complications and promoting recovery․

1․1 Importance of Following Instructions

Adhering to post-extraction instructions is crucial for minimizing complications and ensuring proper healing․ Ignoring guidelines can lead to infection, prolonged recovery, or dislodgement of the blood clot, which protects the wound․ Following instructions carefully promotes a smooth and swift recovery process after tooth extraction․

1․2 General Guidelines for Recovery

General recovery guidelines emphasize keeping the wound undisturbed and maintaining oral hygiene․ Patients should apply gauze as directed, avoid smoking, and refrain from using straws․ Rest, a soft diet, and avoiding strenuous activities are recommended․ Proper care ensures the blood clot remains intact, promoting healing and reducing the risk of complications․

Immediate Post-Operative Instructions

After extraction, rest is crucial, and patients should avoid strenuous activities․ Follow all instructions provided by your dentist to ensure proper healing and minimize discomfort or complications․

2․1 Biting on Gauze

Biting on gauze is essential to control bleeding and promote clot formation․ Keep the gauze in place for 30-45 minutes․ If bleeding continues, replace it with a clean, damp gauze or a tea bag․ Avoid disturbing the area to ensure proper healing․

2․2 Controlling Bleeding

Some bleeding is normal after extraction․ To control it, place a clean, damp gauze or tea bag over the site and bite firmly for 30-45 minutes․ The tannic acid in tea can help form a clot․ Avoid rinsing, spitting, or smoking, as these can dislodge the clot and prolong bleeding․

2․3 Ice Application

Apply an ice pack wrapped in a cloth to the affected area to reduce swelling․ Use it for 10 minutes, then rest for 20 minutes, repeating as needed․ This helps minimize inflammation and discomfort during the initial healing phase․

Activity Restrictions

Avoid smoking, strenuous activities, and using straws for 24-48 hours․ Limit physical exertion to prevent dislodging the blood clot and promoting a smooth recovery․

3․1 Avoiding Smoking

Smoking should be avoided for at least 24-48 hours after extraction․ It can dislodge the blood clot, leading to dry socket and delaying healing․ Tobacco use reduces blood flow, increasing the risk of complications and prolonging recovery․ Avoiding smoking promotes a healthier healing process and prevents infection․

3․2 Limiting Physical Activity

Rest is crucial after extraction․ Avoid strenuous activities for 24-48 hours to prevent dislodging the clot․ Gentle movement is okay, but excessive exercise can increase bleeding and swelling․ Limiting physical activity helps the body heal faster and reduces the risk of post-operative complications․

3․3 Avoiding Certain Beverages

Refrain from alcohol, carbonated drinks, and hot beverages for 24-48 hours․ These can dislodge the clot, delay healing, or irritate the wound․ Stick to soft, cool, or lukewarm drinks to protect the extraction site and promote a smooth recovery without complications․

Oral Hygiene

Resume brushing gently 24 hours post-procedure with a soft toothbrush․ Avoid the extraction site initially․ Use chlorhexidine or saline solution for rinsing to maintain cleanliness and promote healing․

4․1 Resuming Brushing

Resume brushing gently with a soft toothbrush 24 hours after the procedure․ Avoid the extraction site to prevent dislodging the clot․ Start with gentle strokes and gradually return to normal brushing, ensuring good oral hygiene to support healing and prevent infection․

4․2 Rinsing and Mouthwash

Begin rinsing with saltwater or chlorhexidine mouthwash 24 hours post-procedure․ Gently swish the solution without vigorous rinsing․ Avoid using mouthwash if you have high blood pressure․ This helps maintain oral hygiene, reduces bacteria, and promotes healing without dislodging the clot or irritating the extraction site․

Dietary Recommendations

Stick to a soft, cold, or lukewarm diet for the first 72 hours․ Avoid hot, hard, or sharp foods․ Gradually introduce normal foods as healing progresses․

5․1 Soft Food Diet

A soft food diet is recommended for the first 24-48 hours after extraction․ Opt for foods like yogurt, scrambled eggs, and soft soups․ Avoid hot, hard, or crunchy foods that could disrupt healing․ Stay hydrated with water and avoid carbonated beverages․ Gradually reintroduce normal foods as comfort allows, ensuring gentle chewing near the extraction site․

5․2 Avoiding Hot or Hard Foods

Avoid hot or hard foods for the first few days to protect the extraction site․ Hot foods can dissolve the blood clot, while hard foods may irritate the wound․ Opt for soft, cool, or lukewarm options like mashed potatoes, smoothies, or soft-cooked vegetables․ Introduce harder foods gradually after healing begins, ensuring gentle chewing to avoid dislodging the clot․

5․3 Staying Hydrated

Staying hydrated is crucial for healing and blood clot stability after extraction․ Drink plenty of water and clear broths, avoiding alcohol and carbonated beverages; Do not use straws, as suction can dislodge the clot․ Opt for gentle sips and room-temperature water to promote recovery without disrupting the wound․

Pain Management

Use prescribed medications as directed to manage discomfort․ Over-the-counter pain relievers, like ibuprofen, can also help․ Monitor pain levels and adjust medication accordingly to ensure comfort during recovery․

6․1 Using Prescribed Medications

Take prescribed pain medications exactly as directed by your dentist to manage discomfort effectively․ Start medication before the anesthetic wears off for optimal relief․ Follow dosage instructions carefully and avoid exceeding recommended limits․ If pain persists despite medication, contact your dentist for further guidance or adjustments to your treatment plan․

6․2 Over-the-Counter Options

Over-the-counter pain relievers like ibuprofen or acetaminophen can help manage mild to moderate discomfort․ Use as directed on the packaging or as recommended by your dentist․ These medications are effective for reducing swelling and pain but always follow dosage guidelines to avoid side effects․ Consult your dentist before use, especially if you have medical conditions or take other medications․

Monitoring for Complications

Monitor for signs of infection, excessive bleeding, or severe swelling․ Contact your dentist immediately if you experience unusual symptoms or increasing pain, as these may indicate complications․

7․1 Signs of Infection

Signs of infection after tooth extraction include redness, swelling, increased pain, pus, or a bad taste․ Additionally, fever or foul odor may indicate infection․ Monitor these symptoms closely and contact your dentist if they persist or worsen, as prompt treatment is essential to prevent complications․

7․2 Excessive Bleeding

Excessive bleeding after tooth extraction is rare but concerning․ If bleeding doesn’t stop with gauze, try a damp tea bag․ Avoid smoking, drinking through straws, or spitting․ If bleeding persists, contact your dentist immediately, as it may require further intervention to control․

7․3 Severe Swelling or Pain

Severe swelling or pain after extraction is uncommon but requires attention․ Apply ice to reduce swelling and elevate your head while resting․ Continue with prescribed pain medication and soft diet․ Avoid smoking or strenuous activities․ If symptoms worsen or persist, contact your dentist immediately for further evaluation and treatment․

Additional Tips for Recovery

  • Avoid using straws to prevent dislodging the blood clot․
  • Keep your head elevated while resting to reduce swelling․
  • Do not disturb the wound with your tongue or fingers․

8․1 Avoiding the Use of Straws

Using straws is discouraged after tooth extraction, as the suction can dislodge the blood clot, leading to dry socket or delayed healing․ Stick to drinking directly from a glass to prevent complications․

8․2 Keeping the Head Elevated

Elevating your head using pillows, especially while sleeping, helps reduce swelling and promotes healing after tooth extraction․ This position allows fluid to drain away from the surgical site, minimizing discomfort and supporting the recovery process effectively․

8․3 Avoiding Disturbing the Wound

Refrain from touching the extraction site with fingers, tongue, or utensils to prevent irritation, bleeding, or infection․ The blood clot is crucial for healing, and disturbing it can dislodge the clot, leading to complications such as dry socket and prolonged recovery time․ Keeping the area undisturbed ensures proper healing and reduces the risk of infection․

Healing Process Timeline

The wound typically begins to close within the initial 24 hours, with gradual tissue coverage over the subsequent weeks․ Full healing varies depending on the complexity of the extraction․

9․1 First 24 Hours

  • Maintain the gauze for 30-60 minutes to control bleeding and promote clot formation․
  • Apply ice to reduce swelling and discomfort during the first day․
  • Avoid smoking, using straws, or spitting to prevent dislodging the blood clot․
  • Keep the head elevated while resting to minimize bleeding and swelling․

9․2 Subsequent Days and Weeks

Gradually resume normal activities, avoiding heavy exercise for 48 hours․ Gently brush the area with a soft toothbrush starting the next day․ Avoid smoking for 72 hours to prevent delayed healing․ Introduce soft foods gradually and avoid hard or hot foods until healed․ Monitor the wound for signs of infection or unusual swelling․

Important Reminders

Always follow your dentist’s instructions carefully․ Attend follow-up appointments to ensure proper healing․ Stay hydrated and maintain a soft diet until fully recovered․ Contact your dentist immediately if concerns arise․

10․1 Follow-Up Appointments

Follow-up appointments are crucial for monitoring healing progress․ Your dentist will check the wound, ensure proper clot formation, and address any concerns․ Schedule and attend these visits as recommended to prevent complications and ensure a smooth recovery․

10․2 Contacting Your Dentist

If you experience heavy bleeding, severe pain, swelling, or signs of infection, contact your dentist immediately․ Reach out if you notice unusual healing or concerns․ Timely communication ensures proper care and prevents complications, fostering a smooth recovery․

Following post-extraction care instructions ensures proper healing and prevents complications․ Adhering to guidelines promotes recovery, allowing patients to regain oral health and comfort effectively․

11․1 Summary of Key Points

Proper post-extraction care involves protecting the blood clot, avoiding smoking, and limiting physical activity; Maintaining oral hygiene, following a soft diet, and managing pain are crucial․ Monitor for signs of infection or excessive bleeding and attend follow-up appointments to ensure a smooth recovery and optimal healing․

11․2 Final Tips for a Smooth Recovery

Stay hydrated, eat soft foods, and avoid strenuous activities․ Elevate your head while resting and brush gently around the extraction site․ Attend follow-up appointments and contact your dentist if concerns arise․ Adhering to these tips ensures a comfortable and efficient recovery process after tooth extraction․

cold brew coffee maker instructions

Cold brew coffee has gained popularity for its smooth, low-acidity flavor. This guide provides easy step-by-step instructions to brew perfect cold coffee at home using a coffee maker.

What is Cold Brew Coffee?

Cold brew coffee is a unique brewing method where coarse-ground coffee beans steep in cold water for 12–24 hours. This process extracts flavors without heat, resulting in a smooth, low-acidity coffee. Unlike hot-brewed coffee, cold brew avoids the risk of burnt or over-extracted flavors, creating a sweeter and less bitter taste. The immersion method ensures all coffee grounds are submerged, preventing under-extraction. The extended steeping time allows the coffee’s natural oils and flavors to slowly release, producing a rich and full-bodied drink. Cold brew is highly versatile and can be enjoyed over ice, with milk, or even used in coffee-based cocktails. Its refreshing taste makes it a perfect choice for hot summer days, appealing to both coffee enthusiasts and casual drinkers alike.

Why Use a Cold Brew Coffee Maker?

A cold brew coffee maker simplifies the brewing process, ensuring consistent results. It eliminates the need for multiple containers and manual stirring, making cleanup easier. The maker’s built-in filter and steeping container streamline the process, reducing mess and effort. Unlike using a French press or Mason jar, a dedicated cold brew maker is designed specifically for this method, ensuring optimal extraction and flavor. It also prevents over-extraction, which can occur with manual methods. The compact design saves space and makes storage convenient. Overall, a cold brew coffee maker offers efficiency, convenience, and superior flavor control, making it a worthwhile investment for coffee enthusiasts.

Choosing the Right Equipment

Choosing the right equipment is essential for perfect cold brew. Options include French presses, Mason jars, or dedicated cold brew makers. Consider size, ease of use, and cleanup. A built-in filter and steeping container streamline the process, ensuring flavorful results. Dedicated makers offer convenience and better extraction, making them a popular choice for coffee enthusiasts.

Cold Brew Coffee Makers: Types and Features

Cold brew coffee makers come in various styles, each offering unique features. Glass, plastic, or stainless steel models are common, with built-in filters for easy straining. Some makers include adjustable steeping times, while others have compact designs for convenience. High-end models may feature grinders or multiple chambers for precise extraction. Portable options are great for travel, while large-capacity makers suit households. Key features to consider include ease of cleaning, durability, and compatibility with storage. These designs cater to different preferences, ensuring a smooth and flavorful brewing experience tailored to individual needs.

Additional Tools: Grinder, Scale, and Storage

A grinder ensures freshly ground coffee beans, essential for optimal flavor. A scale helps measure precise coffee-to-water ratios, guaranteeing consistency. Proper storage containers, like glass or stainless steel, preserve the brew’s freshness. These tools enhance the brewing process, ensuring a perfect cup every time.

Step-by-Step Brewing Instructions

Start with grinding beans, mix with water, steep for 12-24 hours, then strain. This simple process ensures smooth, full-bodied cold brew coffee every time.

Grinding the Coffee Beans

Start by grinding your coffee beans to a coarse or medium-coarse texture. A burr grinder is ideal, but a spice grinder with short pulses works too. Avoid fine grinds, as they can lead to over-extraction and a bitter taste. Coarse grinding ensures optimal flavor extraction during the steeping process. For the best results, grind the beans just before brewing to preserve freshness and aroma. If using pre-ground coffee, ensure it’s specifically labeled as “coarse grind” for cold brew. Proper grinding is essential for achieving the smooth, balanced flavor cold brew is known for. This step sets the foundation for a perfect brew.

Mixing Coffee Grounds with Water

After grinding, combine the coarse coffee grounds with water in a large container or the cold brew maker’s chamber. Use a 1:4 to 1:8 coffee-to-water ratio for a balanced brew. Stir thoroughly to ensure all grounds are evenly saturated. Use fresh, room-temperature water for optimal extraction. If using a dedicated cold brew maker, place the grounds in the filter or infuser, then add water gradually, stirring gently. Ensure no dry spots remain. Cover the container or seal the maker to prepare for steeping. Proper mixing ensures consistent flavor and prevents under- or over-extraction during the brewing process. This step is crucial for achieving the signature smoothness of cold brew coffee.

Steeping the Coffee

Once mixed, the coffee grounds and water mixture needs to steep. Place the container or cold brew maker in the refrigerator to steep for 12 to 24 hours. The longer it steeps, the stronger the flavor becomes. Stir the grounds gently halfway through steeping to ensure even extraction. Keep the mixture at refrigerator temperature (around 40°F) to prevent over-extraction and bitterness. Avoid steeping at room temperature, as it can lead to unwanted flavors. After steeping, the coffee is ready to strain and serve. This slow, cold process extracts flavors without the acidity of hot-brewed coffee, resulting in a smooth and refreshing drink;

Straining the Brew

After the steeping process, carefully strain the coffee to separate the grounds from the liquid. If using a cold brew maker, remove the filter or infuser from the container. For other methods, pour the mixture through a fine-mesh sieve or cheesecloth into another container. Ensure no grounds remain in the brew to avoid bitterness. Discard the solids and transfer the strained coffee to a clean glass bottle. Store it in the refrigerator to chill before serving. Proper straining ensures a smooth, flavorful cold brew. This step is crucial for achieving the desired taste and texture. Your cold brew is now ready to enjoy!

Customizing Your Cold Brew

Personalize your cold brew by adjusting the coffee-to-water ratio, adding flavorings like vanilla or cinnamon, or sweetening with sugar or syrup. Experiment with milk or ice for unique variations.

Adjusting Coffee-to-Water Ratio

Adjusting the coffee-to-water ratio is key to achieving your desired flavor profile in cold brew. A standard ratio is 1:4 to 1:8 (coffee to water by weight). Start with 1:4 for a bold brew or 1:8 for a lighter taste. Experiment by increasing or decreasing coffee for stronger or weaker flavors. Use a scale for precise measurements. For example, 100g of coffee with 400ml water yields a balanced cold brew. If too strong, add water; if too weak, add coffee. Adjusting the ratio allows you to customize the brew to your taste preferences, ensuring each batch is tailored to your liking.

Adding Flavorings and Sweeteners

Cold brew coffee can be customized with various flavorings and sweeteners to enhance its taste. Popular additions include vanilla extract, cinnamon, or citrus zest for unique flavor profiles. For sweetness, options like sugar, honey, or syrup can be added after brewing. Milk or creamers can also be incorporated for a creamier texture. Experiment with different combinations to find your perfect blend. When adding flavorings, mix them into the coffee before steeping for even distribution. Sweeteners are best added after straining to ensure they dissolve properly. This step allows you to tailor your cold brew to your taste preferences, making each cup uniquely delicious and personalized.

Serving Suggestions: Hot, Iced, or Blended

Cold brew coffee offers versatility in how it’s enjoyed. For a refreshing drink, serve it over ice with water or milk. To enjoy it hot, simply heat the brewed coffee and add your preferred sweeteners or creamers. For a blended treat, combine cold brew with ice, milk, and flavorings like vanilla or chocolate in a blender. You can also customize it further by adding syrups, whipped cream, or spices. Experimenting with these methods allows you to enjoy cold brew in various ways, whether you prefer a classic iced coffee, a warm pick-me-up, or a creamy blended beverage. This versatility makes cold brew a perfect choice for any time of day or season.

Maintenance and Troubleshooting

Regularly clean your cold brew coffee maker to prevent residue buildup. For troubleshooting, check water flow, coffee-to-water ratio, and steeping time to ensure optimal flavor consistency.

Cleaning Your Cold Brew Coffee Maker

Cleaning your cold brew coffee maker is essential for maintaining freshness and preventing residue buildup. Rinse the maker thoroughly with warm water after each use. For deeper cleaning, mix equal parts water and mild dish soap, soak the components for 10-15 minutes, then scrub and rinse. Avoid harsh chemicals or abrasive cleaners, as they may damage materials. Dry all parts completely to prevent moisture buildup. Regular cleaning ensures your cold brew tastes fresh and prevents any lingering flavors from affecting future batches. For tough stains, a vinegar and water solution can be used periodically. Always follow the manufacturer’s care instructions for specific models.

Troubleshooting Common Issues

Common issues with cold brew coffee makers often relate to flavor or functionality. If your brew tastes weak, check the coffee-to-water ratio or steeping time. For stronger coffee, increase the grind quantity or extend the steeping period. Sediment in the brew may indicate improper straining or a damaged filter. Ensure the filter is tightly sealed and replace it if necessary. If water isn’t flowing through the maker, check for blockages in the mesh or tubes. Clean the maker regularly to avoid residue buildup. For slow dripping, ensure the maker is properly assembled. Always refer to the manufacturer’s guide for specific troubleshooting steps. Addressing these issues ensures consistently great-tasting cold brew every time.

Cold brew coffee is a delightful and refreshing beverage that’s perfect for any time of the year. By following the step-by-step instructions and tips provided, you can effortlessly create smooth, flavorful cold brew at home. Experiment with ratios, steeping times, and flavor additions to tailor your brew to your taste preferences; With the right equipment and a little patience, you’ll enjoy high-quality cold brew coffee without the need for expensive cafe visits. Whether you prefer it over ice, mixed with milk, or blended into a refreshing drink, cold brew offers endless possibilities; Happy brewing and enjoy the perfect cup every time!